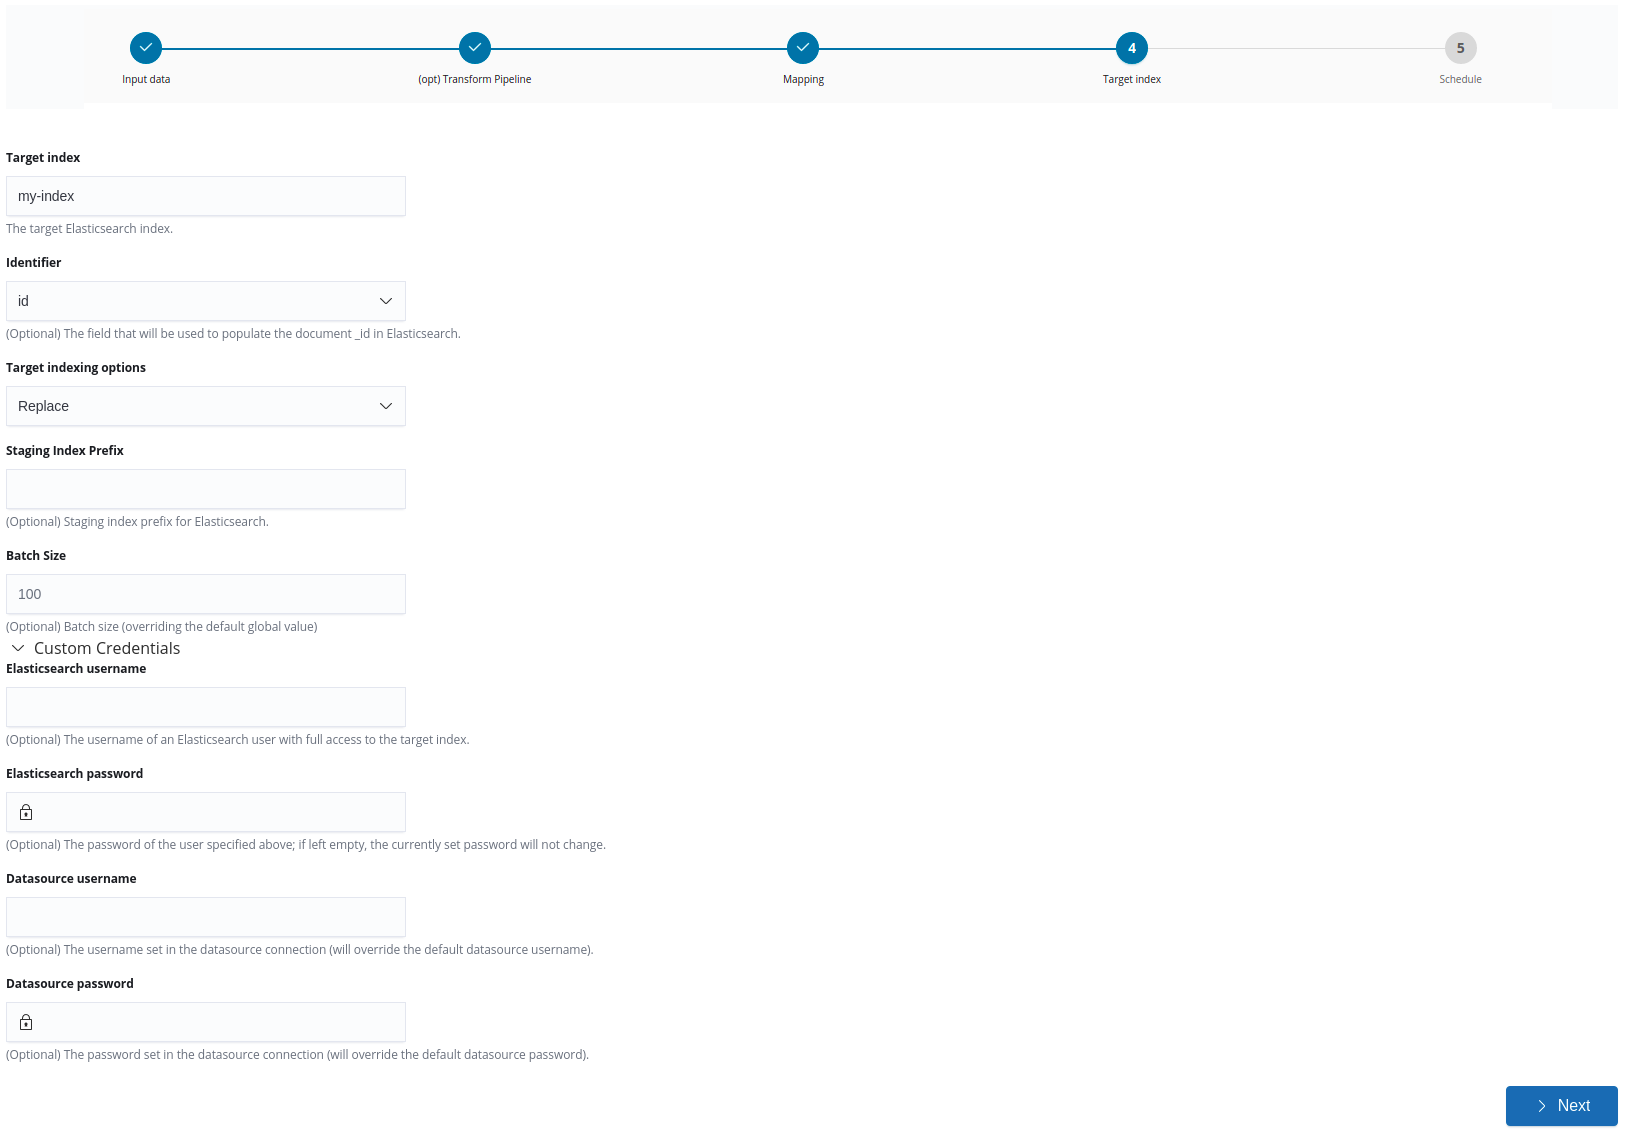
Managing data imports from datasources
This section describes the Data import app, which allows you to manage import jobs from JDBC datasources.
If you are ready to import data from a datasource, go to the Data model app and follow the instructions in Importing data from a datasource.
|
To import data from Excel or CSV files, go to the Data model app and follow the instructions in Importing data from a spreadsheet. |
Datasource reflection jobs
Each datasource reflection job is defined by a configuration. Configurations can be managed on the Datasource Reflection Jobs screen:
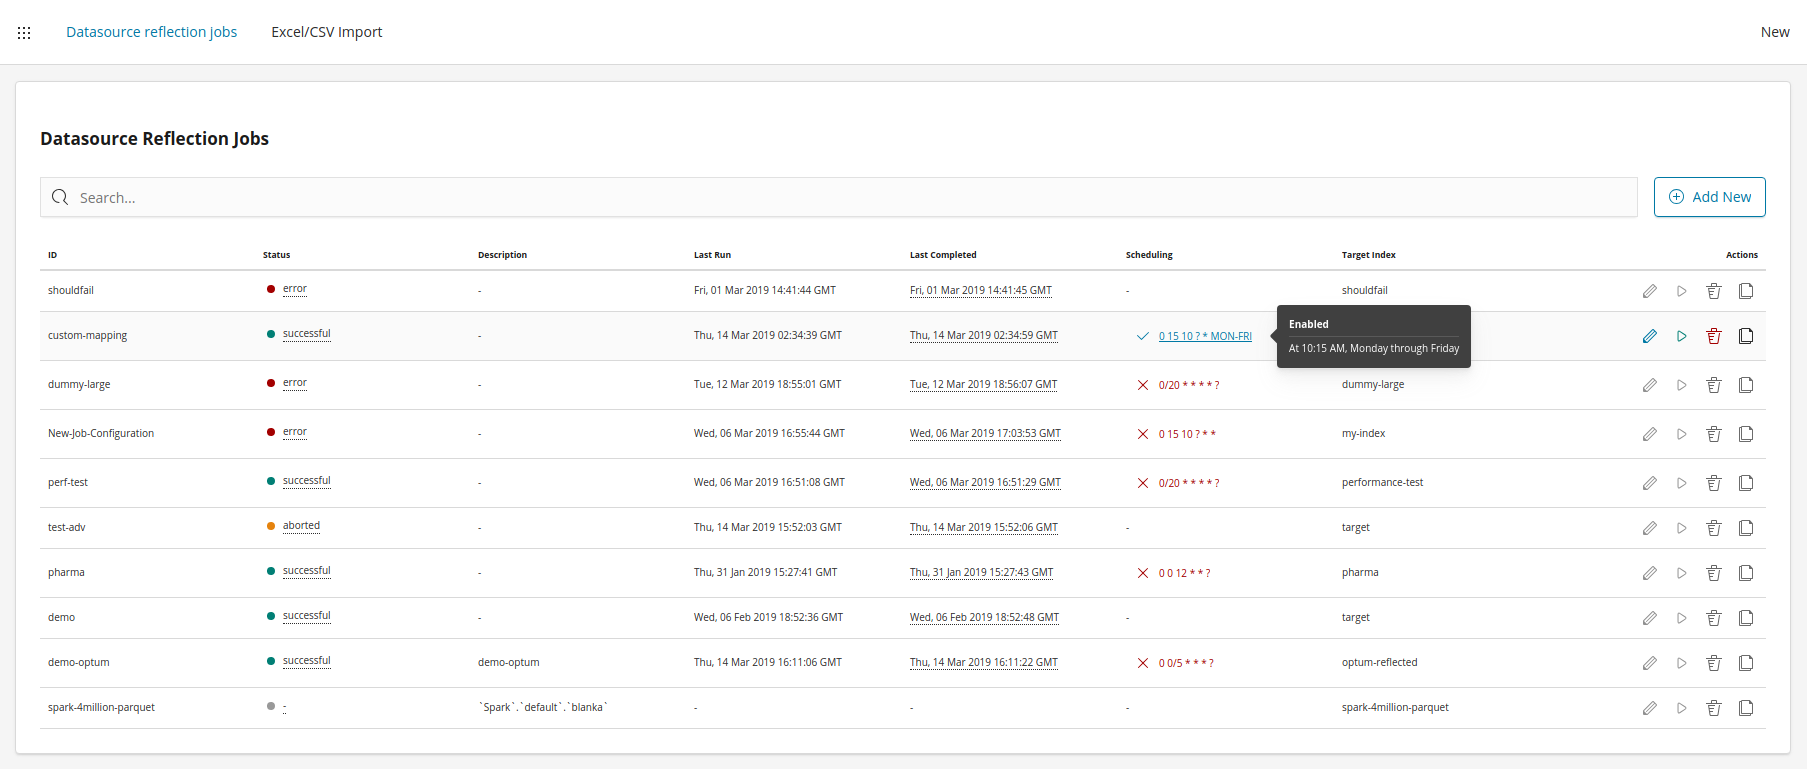
Each job can be either scheduled to run periodically by using a cron syntax or can be run manually from the Jobs screen. The following actions can be performed on the Jobs screen:
-
Add a new job
-
Edit an existing job
-
Manually run a job
-
Delete a job configuration
-
Clone a job configuration
-
Enable or disable a scheduled job
Defining a new datasource reflection job
To define a new datasource reflection job, complete the following steps:
Step 1: Data input
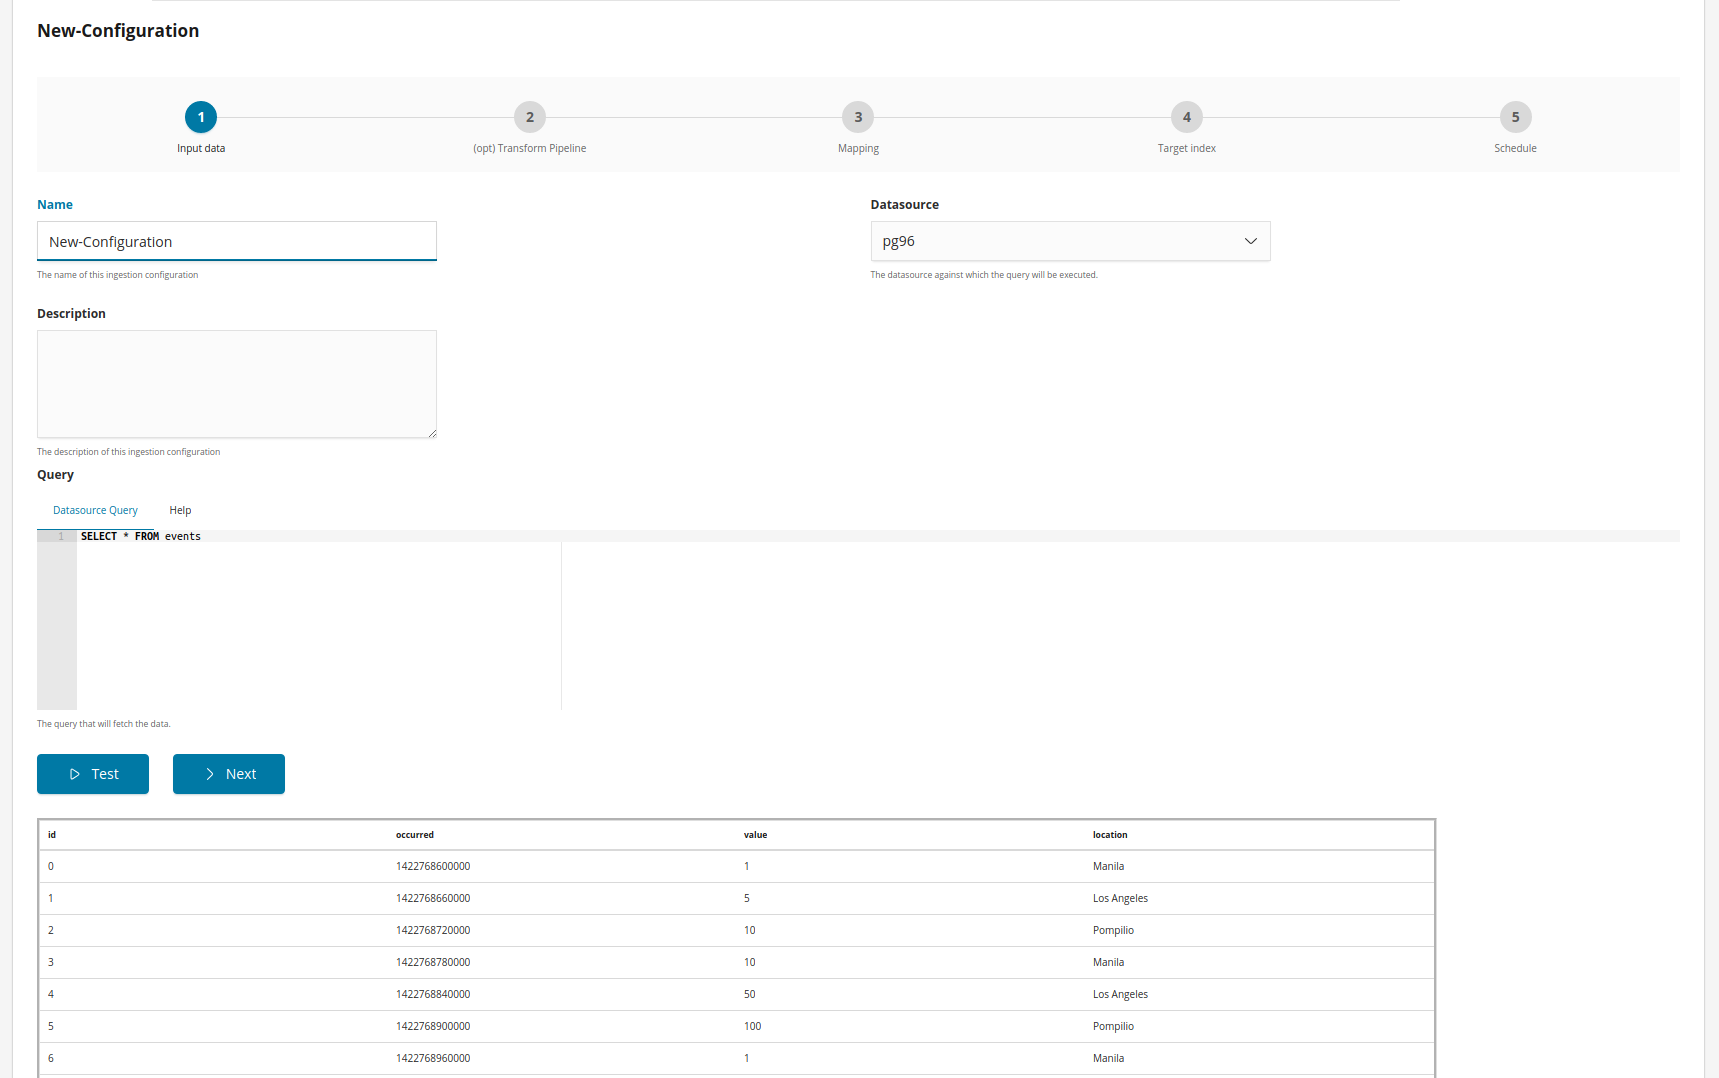
Give a name and a description (optional) to the job, then select a datasource and write the query.
If you are selecting a virtual index as a datasource, then start with the default query for that virtual index.
Writing a query
The query defined in the reflection configuration is written in the datasource language.
The query can be written using mustache and the following variables are
provided, if applicable, when converting the query to a string:
max_primary_key: the maximum value of the primary key in Elasticsearch, available if the primary key is numeric.
last_record_timestamp: the UTC timestamp at which the last record was successfully processed by an reflection job.
last_record: an array with the scalar values in the last record that was successfully processed by the reflection job.
Example:
SELECT * FROM "Player" {{#max_primary_key}}
WHERE "NAME">'{{max_primary_key}}'{{/max_primary_key}}
Step 2: Set the transformation pipeline (optional)
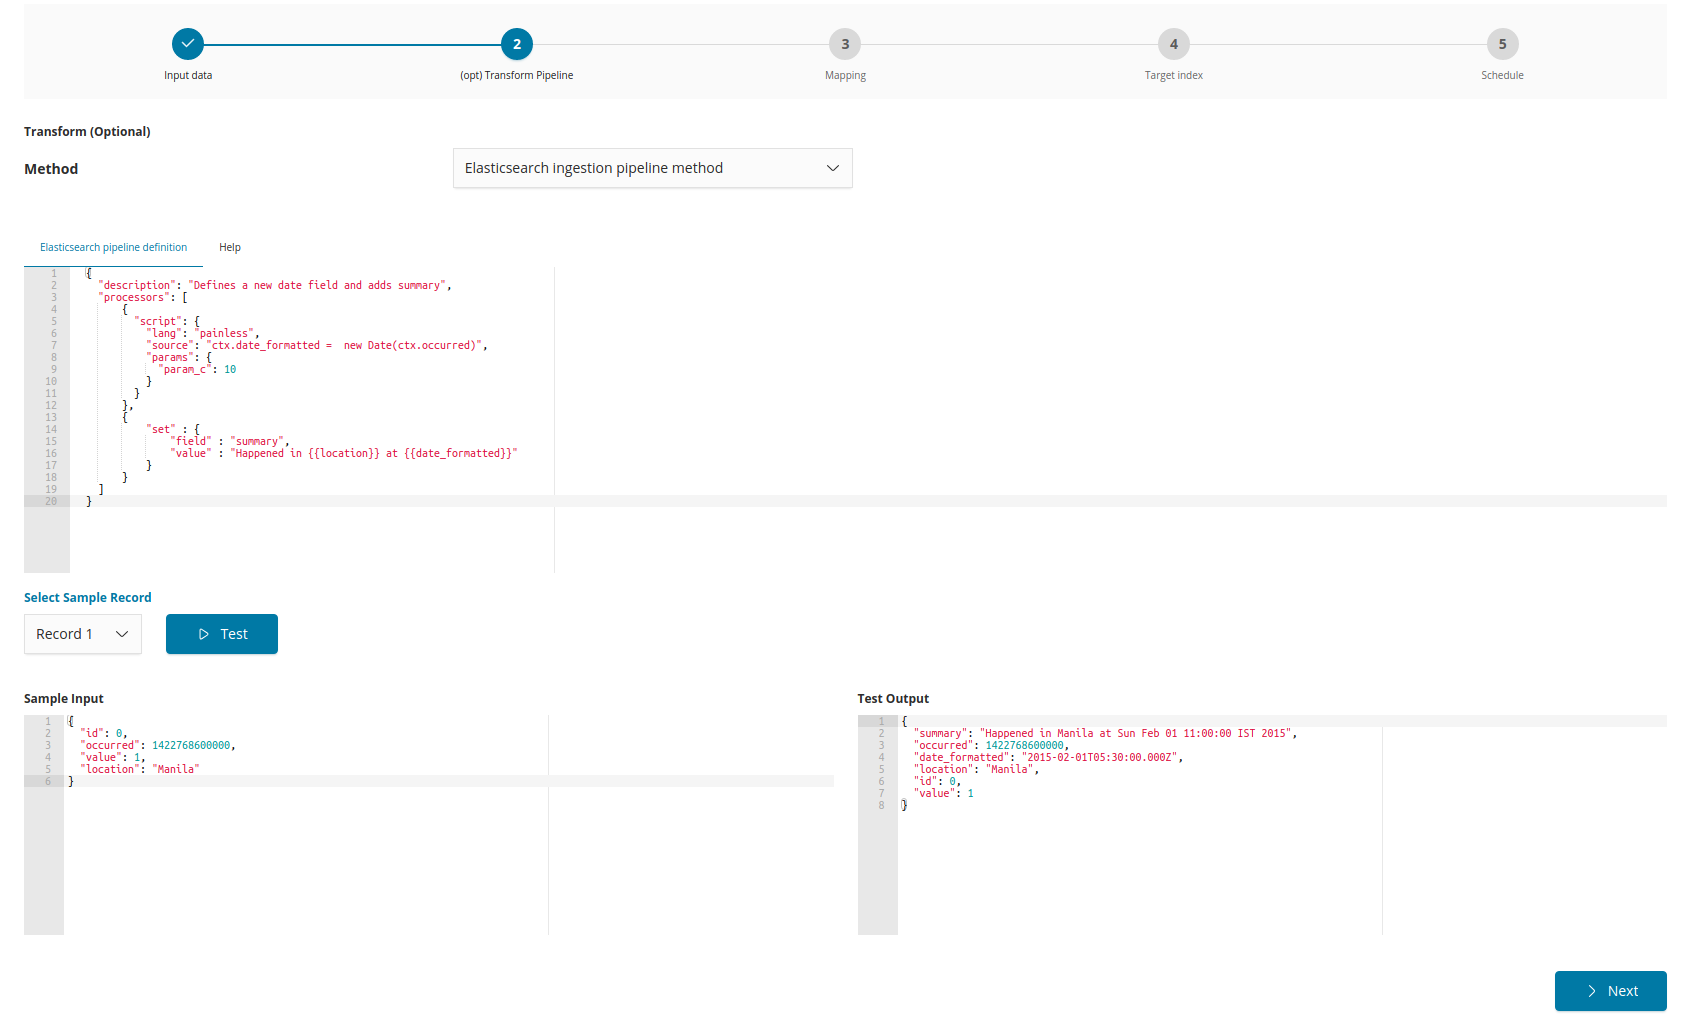
This is an optional step where a pipeline may be defined to enrich the reflected documents. For more information, see Datasource reflection pipelines.
Step 3: Mapping
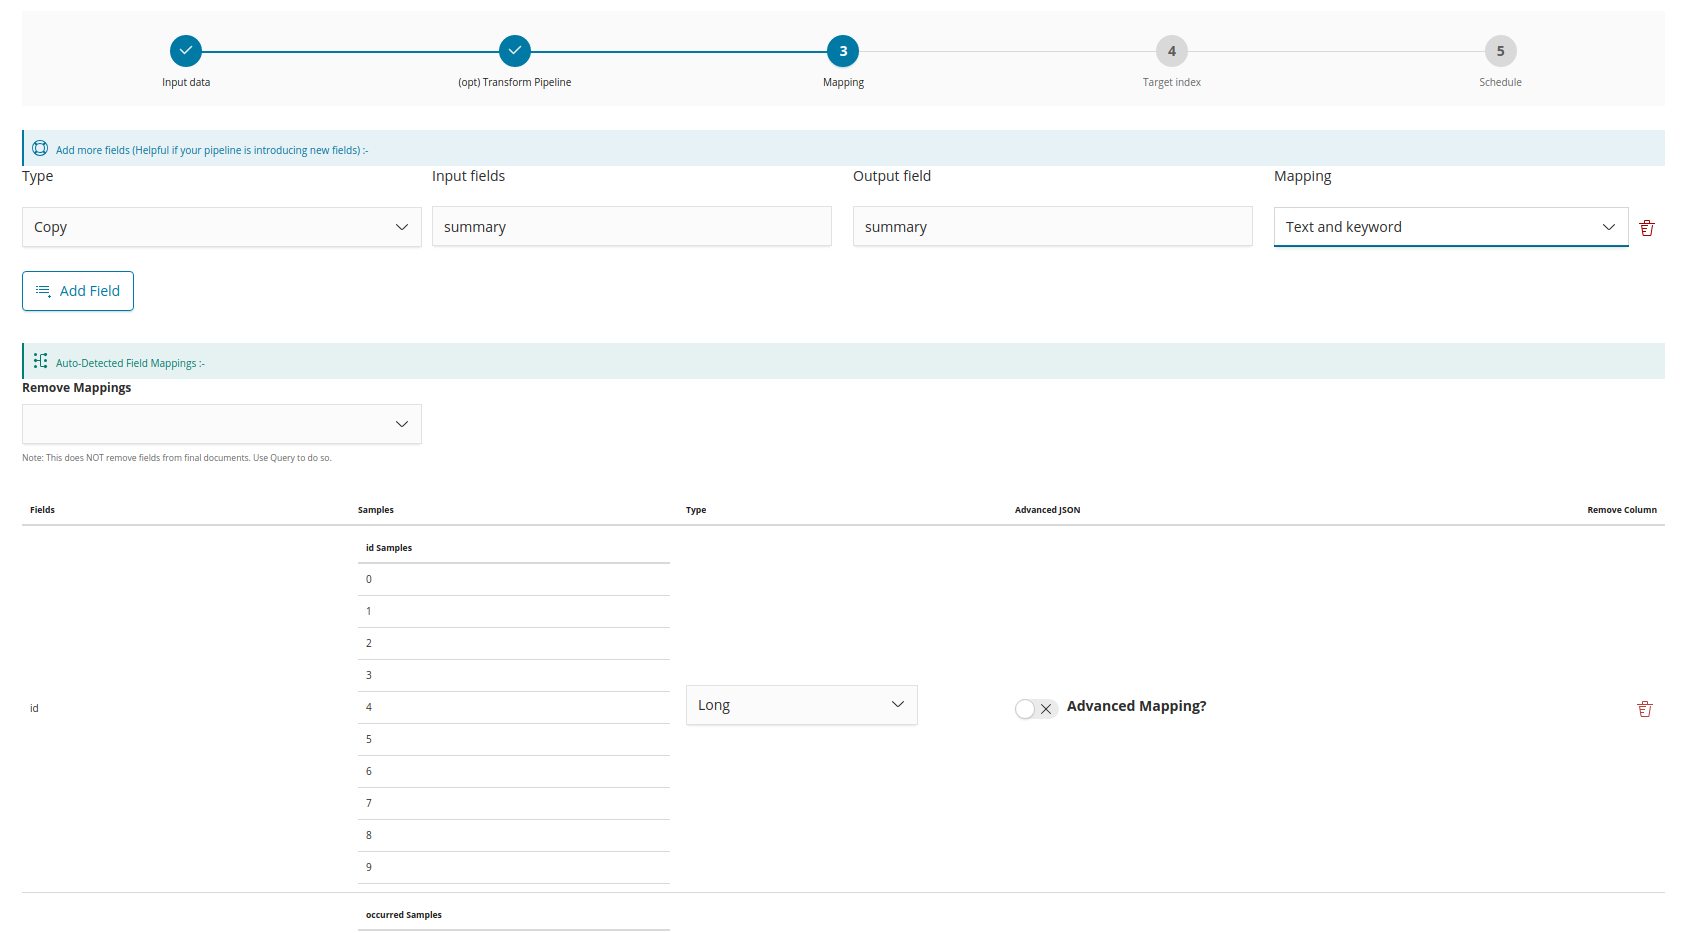
The mapping for the fields received from the datasource is auto-detected. However, you can change the mapping to other valid field types and you can add new fields if any fields were not auto-detected.
Define advanced mapping
This switch gives advanced users the option to add a JSON object to define the mapping in Elasticsearch format. For example, selecting Date and switching the Define advanced mapping switch to ‘on’ would allow you to define one or more parsing formats for the date field, such as {"format":"yyyy-MM-dd HH:mm"}. These formats must match the actual structure of the date in the source documents, otherwise the import will not complete. For more information, see
Defining an advanced mapping.
Datasource reflection pipelines
Pipelines may be used to enrich documents before they are indexed to Elasticsearch.
Siren Platform provides a JSON web service processor pipeline. Elasticsearch ingest processors can be also be used.
For more information about transform pipelines, see Sample transform pipelines.
JSON Web service processor:
The following pipeline can be used to call an external JSON Web service and copy the returned JSON structure to the record.
|
A transform that relies on external Web services to enrich the documents might be slow to respond or might result in the import process stalling. If you notice such an issue, then go to Management → Advanced Settings and reduce the value of the |
{
  "description": "enriching documents from a web service",
  "processors": [
    {
      "json-ws": {
        "resource_name": "siren-nlp",
        "method": "post",
        "url": "http://35.189.96.185/bio",
        "input_map": {
          "$.Abstract": "text"
        },
        "output_map": {
          "Abstract_text_mined_entities": "$"
        },
        "input_default": {
          "text": "''"
        }
      }
    }
  ]
}
In this example, the configuration takes the value of the Abstract field (path syntax) and posts a request {"text": abstract_value} to http://35.189.96.185/bio. If the Abstract field is null, an empty string will be sent instead (input_default).
The JSON response object is used as the value of a new field Abstract_text_mined_entities at the top level ($) of the document.
This pipeline is defined with a json-ws field inside processors.
The following configurations are also available:
| Name | Required | Default | Description |
|---|---|---|---|
method |
no |
get |
The HTTP method: get, post, put |
url |
yes |
- |
The URL endpoint of the web service. |
requests_per_second |
no |
0 |
The expected maximum number of requests per second. |
resource_name |
yes |
- |
Apply a name to the web service resource. Every processor instance with the same resource name are consolidated and submitted to the requests_per_second limit. |
input_map |
yes |
- |
A map with a JSON Path expression as the key and a field name as the value. It builds the JSON structure that will be submitted to the external web service. |
input_default |
no |
- |
A map with a field as the key and a default value. For a given field, this map provides a default value if the JSON Path expression of the input_map does not return any value. |
output_map |
yes |
- |
A map with a field name as the key and a JSON Path expression as the value. The JSON Path expressions are applied to the JSON structure returned by the external web service. The indexed document is filled with results of the JSON Path expressions associated to the given field name. Already existing content for the field name is replaced. |
output_default |
no |
- |
A map with a field as the key and a default value. For a given field, this map provides a default value if the JSON Path expression of the output_map does not return any value. |
error_output_field |
no |
- |
If this field is not blank and an error occurs while calling the external external the field is filled with a the error message and the ingestion process is not stopped. If the field is empty, an exception is thrown. |
time_out |
no |
300 |
This timeout determines how many seconds should the request wait for a response before failing the request. |
username |
no |
- |
If a username is provided the HTTP(S) connection to the external web service will use it as the username for an HTTP basic authentication. |
password |
no |
- |
If a password is provided the HTTP(S) connection to the external web service will use it as the password for an HTTP basic authentication. |
Security setup
See the the access control permissions (ACL) required by this data import plugin for Elasticsearch:
ingestion_role:
cluster:
  - 'cluster:admin/federate/connector/ingestion/search' // To fetch the list of ingestion configs
  - 'cluster:admin/federate/connector/ingestion/run' // To manually trigger an ingestion
  - 'cluster:admin/federate/connector/jobs/abort' // To abort a job
  - 'cluster:admin/federate/connector/ingestion/get' // To fetch an ingestion config.
  - 'cluster:admin/federate/connector/ingestion/put' // To create an ingestion config
  - 'cluster:admin/federate/connector/ingestion/delete' // To delete an ingestion config
  - 'cluster:admin/federate/connector/datasource/sample' // To sample a SQL query
  - 'cluster:admin/ingest/pipeline/simulate' // To test transform pipeline
  - 'cluster:admin/ingest/pipeline/put' // To put transform pipeline (Excel)
  - 'cluster:admin/ingest/pipeline/delete' // To delete a transform pipeline (Excel) (We need to clear temporary pipelines after import)
indices:
  'csv-*': //This can be limited to specific indices and such permissions would be regarded by Excel Import
    '*':
      - 'indices:admin/get' // To check if an index already exists, if received 403 then user cannot use excel import on that index
      - 'indices:admin/create' // Create an index (You may prevent it in case you want users to only append data to an existing index)
      - 'indices:admin/delete' // Delete an index (You may prevent it, in case you don't want users deleting stuff)
      - 'indices:admin/mapping/put' // Define mapping (You may prevent it in case you want users to only append to an existing index and modify mappings)
      - 'indices:data/write/index' // (To write docs)
      - 'indices:data/write/bulk[s]' // (To write docs)
      - READ                         # To see field capabilities on data model page
      - VIEW_INDEX_METADATA          # Needed to create index patterns
  '?siren-excel-configs':
      '*':
        - 'indices:data/read/search'   # List saved configs
        - 'indices:data/write/index'   # Create a saved config
        - 'indices:data/write/bulk[s]' # Create a saved config
        - 'indices:data/read/get'      # Use a saved config
        - 'indices:data/write/delete'  # Delete a saved config
Scheduler Cron Syntax
Introduction
Cron-Expressions are used to configure schedules. Cron-Expressions are strings that are actually made up of seven sub-expressions, that describe individual details of the schedule. These sub-expression are separated with white-space, and represent:
Seconds
Minutes
Hours
Day-of-Month
Month
Day-of-Week
Individual sub-expressions can contain ranges and/or lists.
Wild-cards (the ‘‘ character) can be used to say “every” possible value of this field. Therefore the ‘‘ character in the “Month” field of the previous example simply means “every month”. A ‘*’ in the Day-Of-Week field would therefore obviously mean “every day of the week”.
All of the fields have a set of valid values that can be specified. These values should be fairly obvious – such as the numbers 0 to 59 for seconds and minutes, and the values 0 to 23 for hours. Day-of-Month can be any value 1-31, but you need to be careful about how many days are in a given month! Months can be specified as values between 0 and 11. Days-of-Week can be specified as values between 1 and 7 (1 = Sunday).
The ‘/’ character can be used to specify increments to values. For example, if you put ‘0/15’ in the Minutes field, it means ‘every 15th minute of the hour, starting at minute zero’. If you used ‘3/20’ in the Minutes field, it would mean ‘every 20th minute of the hour, starting at minute three’ – or in other words it is the same as specifying ‘3,23,43’ in the Minutes field. Note the subtlety that “/35″ does *not mean “every 35 minutes” – it mean “every 35th minute of the hour, starting at minute zero” – or in other words the same as specifying ‘0,35’.
The ‘?’ character is allowed for the day-of-month and day-of-week fields. It is used to specify “no specific value”. This is useful when you need to specify something in one of the two fields, but not the other.
Example Cron Expressions
Example 1 – an expression to create a trigger that simply fires every 5 minutes
0 0/5 * * * ?
Example 2 – an expression to create a trigger that fires every 5 minutes, at 10 seconds after the minute (i.e. 10:00:10 am, 10:05:10 am, etc.).
10 0/5 * * * ?
Example 3 – At 10 seconds of every even minute
10 */2 * ? * *
Example 4 – At 10 seconds of every odd minute
10 1-59/2 * ? * *
Example 5 – Every 5 minutes, Weekdays from 8-5.
0 */5 8-16 ? * 2-6
